是否开发过Android应用程序并将其发布到应用商店,如果得到用户评论,会怎么做?
当将应用程序发布到应用商店时,必须对其进行良好的测试,以避免潜在的错误。要节省测试工作,需要一个测试工具。最好的Android应用程序测试工具之一是Selendroid。
- 什么是Selendroid?
- 我们为什么需要Selendroid?
- Selendroid建筑
- Selendroid入门
- 设置Selendroid环境
- 如何启动Selendroid
- Selendroid基本命令
- 使用Selendroid开始第一个测试
什么是Selendroid?
Selendroid是一个测试自动化框架,适用于多种类型的移动应用程序:原生和混合的Android应用程序以及移动网络。

可以使用Selenium 2客户端API编写测试。因为Selendroid仍然重用Web的现有Selenium基础设施
Selendroid是一款功能强大的测试工具。它可以在模拟器和真实设备上使用

我们为什么需要Selendroid?
Selendroid是一个很棒的测试工具。但可能仍然会怀疑它的用处。

本节将介绍Selendroid的重要功能,以回答为什么需要Selendroid的问题。
-
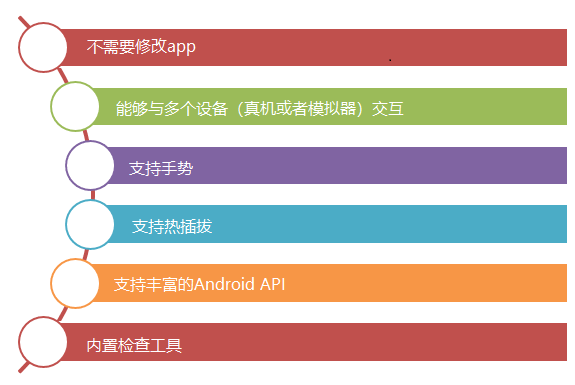
可以使用Selendroid测试测试中的应用程序,而无需对应用程序进行任何修改。只需要在计算机上安装二进制文件(APK)。为了在设备上安装二进制文件,测试应用程序和移动应用程序必须使用相同的签名密钥进行签名
-
Selendroid测试应用程序可以同时与多个设备或模拟器交互。因此,可以在各种Android设备上测试应用程序,以检查兼容性。
-
Selendroid可以在应用程序上模拟人类用户的操作,如在设备上触摸、滑动、拖放
-
可以在测试期间更改硬件设备(插入和拔下),而无需重新启动或停止测试。Selendroid自动识别新设备
-
与Android API版本升级相对应,Selendroid还支持新的Android API(从API 10到API 19)
-
Selendroid还有一些内置的检查器工具,可以帮助识别测试中应用程序的UI元素。例如ID按钮、文本字段、文本视图…
Selendroid建筑
Selendroid基于Android工具框架。Selendroid测试是基于Selenium Web Driver Client API编写的,因此它支持与当前Selenium框架的完全集成。
下图描述了Selendroid的体系结构
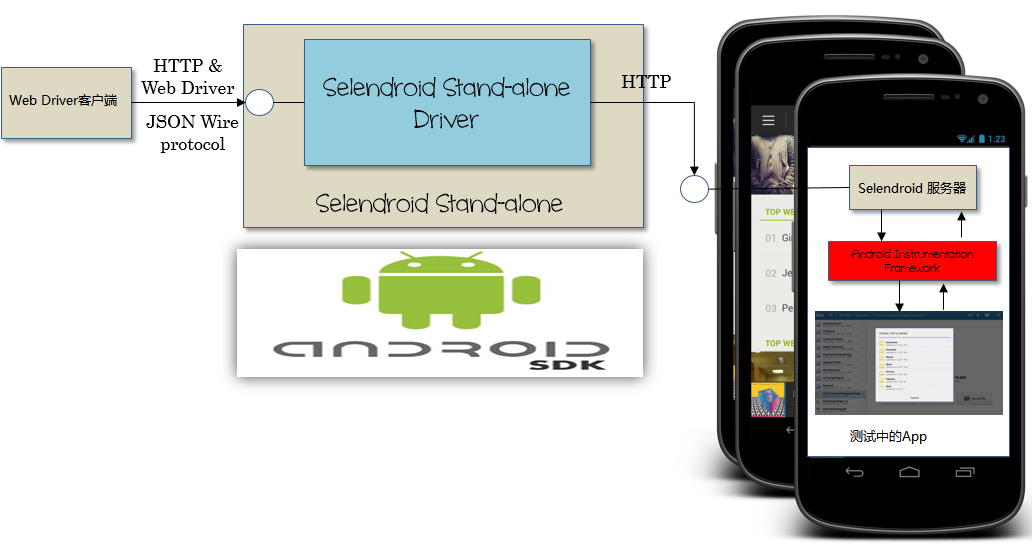
Selendroid包含4个主要组件:

-
Web驱动客户端-基于Selenium的Java客户端库。此库应安装在计算机上(用于开发测试用例)
-
Selendroid-服务器-在Android设备或模拟器上测试的应用程序中运行的服务器。这是Selendroid体系结构的主要组件
-
Android Driver-App-一个内置的Android驱动程序,Web View应用程序,用于测试移动网络。
-
selendroid-Standalone-此组件用于安装Selendroid服务器和被测应用程序(AUT)
Selendroid入门
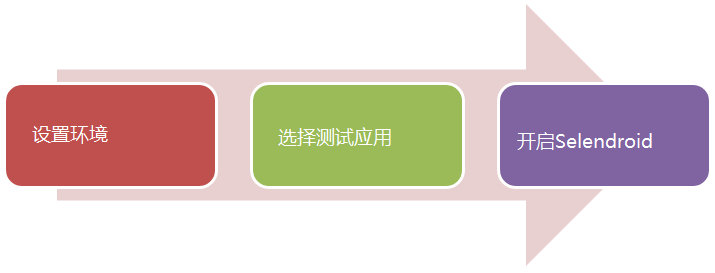
已经知道Selendroid的重要性了,现在让我们来练练手吧。 在使用Selendroid进行测试之前,需要完成3个步骤
设置Selendroid环境
Selendroid可以在Windows、Linux和Mac OS上运行。在本教程中,我们将在Windows OS中设置Selendroid。
在使用Selendroid之前,需要先安装以下软件包
- Java SDK(最低1.6)
必须接受许可协议并下载Java安装程序(根据操作系统选择x64或x86)

将Java SDK作为普通软件下载并安装
- 最新版本的Android SDK
- 计算机必须至少有一个Android虚拟设备(AVD),或者一个插在PC上的真实Android设备。
- 带依赖项的Selendroid独立版、Selendroid客户端和Selenium客户端
- Eclipse软件
- 设置JAVA_HOME和ANDROID_HOME
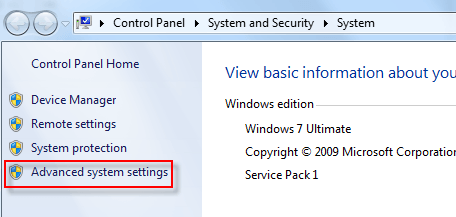
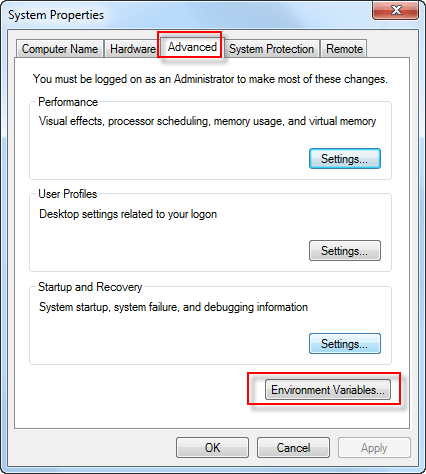
步骤1) 在窗口中,右键单击[计算机]->[属性]->[高级系统设置]
步骤2) 系统属性窗口显示,选择选项卡高级->环境变量
步骤3) 显示环境窗口,单击新建->输入变量Android_HOME,如下所示
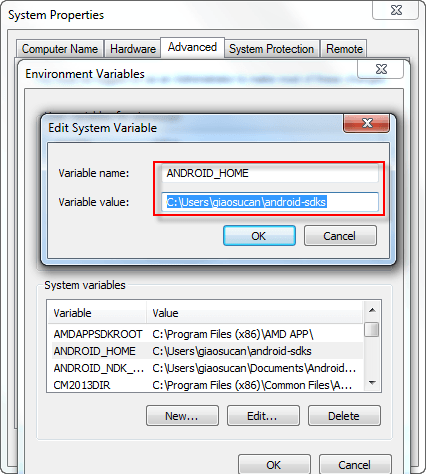
变量值是已经安装的Android-SDK的路径。
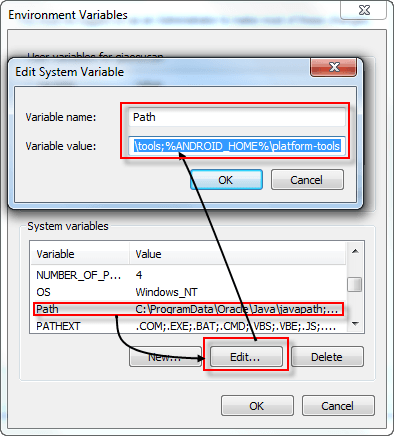
找到系统变量PATH->编辑->在当前行后添加以下行

与ANDROID_HOME类似,添加新变量JAVA_HOME,值如下
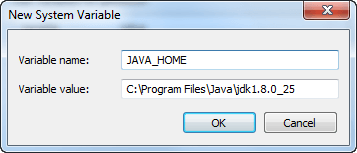
该值是Java JDK安装的路径
步骤4) 重新启动PC->完成
如何启动Selendroid
步骤1) 获取测试中的应用程序
可以使用现有的Selendroid测试应用程序来检查Selendroid是如何工作的。下载完成后,将此APK和上面的Selendroid独立JAR文件复制到独立文件夹中
步骤2) 启动Selendroid
在Windows上打开终端并导航到在步骤1中创建的文件夹。
运行以下命令

输出将显示如下
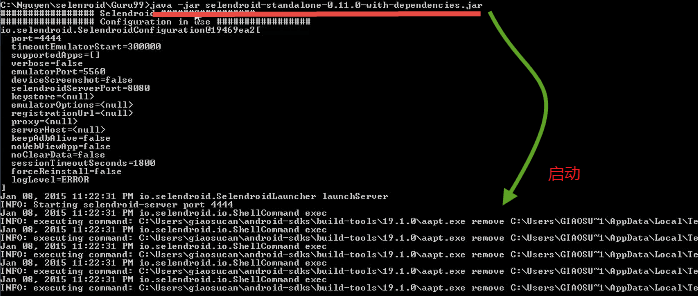
运行此命令后,selendroid-独立HTTP服务器启动!Selendroid将识别Android目标版本和设备屏幕大小。
要查看Android目标版本以及设备信息,可以在浏览器上启动以下URL:
http://localhost:4444/wd/hub/status.

Selendroid基本命令
本节介绍一些基本的Selendroid独立命令行。可以使用它们来设置Selendroid测试环境
1) 设置Selendroid的端口
Selendroid的默认端口为4444。但是可以通过在命令中添加参数来启动selendroid,从而切换到其他端口
参数:-port[端口号]
例如:

在上述命令中,5555是新端口。
因此,用于检查安卓目标版本的url被更改为:http://localhost:5555/wd/hub/status
2) 指定被测应用程序的位置(二进制APK文件),selendroid通常需要此文件的绝对路径
参数:-app[文件路径]
例如:

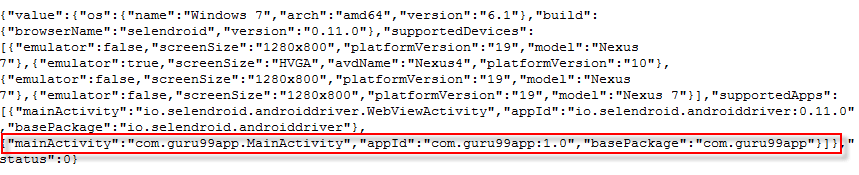
在上述命令中,Selendroid自动查找基于“C:99App.apk”的二进制文件,以获取被测应用程序的信息。
检查url http://localhost:4444/wd/hub/status,将看到以下信息
3) 更改Selendroid用于与检测服务器通信的端口。 Selendroid使用端口8080作为默认端口
参数:-selendroidServerPort[端口号]
示例

端口现在更改为9000
4) 更改超时以启动模拟器 。单位是毫秒。
参数:-timeoutEmulatorStart
默认情况下,Selendroid将等待300,000毫秒,直到模拟器启动。可以通过命令更改为新的超时时间(200,000毫秒

在此时间过期之后,如果仿真器无法启动,Selendroid将抛出异常错误(查找设备/仿真器时出错。)那就别再跑了
5) 当在终端上启动selendroid命令时,将看到屏幕上打印出一个日志 。
可以通过添加以下参数来更改看到的日志类型
参数:-logLevel[日志类型]
日志级别值为ERROR、WARNING、INFO、DEBUG和VERBOSE。默认值:错误。
例如,将selendroid设置为仅打印警告日志,则可以使用以下命令

selendroid仅打印警告日志
使用Selendroid开始测试
本节是使用Selendroid创建第一个测试脚本的分步指南
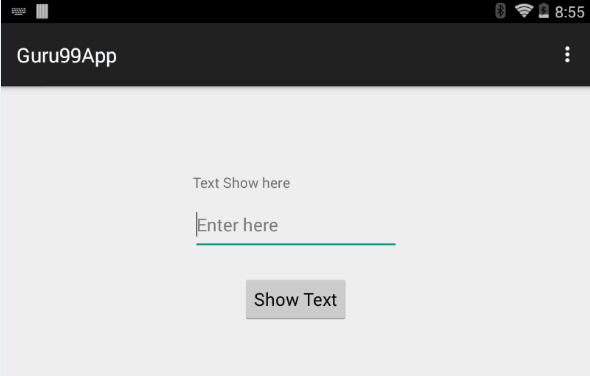
假设我们有一个名为Guru99App的Android应用程序。该应用程序包括一个文本字段和一个名为“Show Text”的按钮。 单击此处下载APK
我们需要使用Selendroid执行以下测试用例
| 测试用例 | 条件 | 预期产量 |
|---|---|---|
| 启动应用程序 在文本字段中输入文本“Guru99 Test” 按“Show Text”按钮 | 测试中的应用程序的二进制文件可用 一台设备已连接到PC | 文本“Text Show Here”将更改为文本 哪个用户在文本字段中输入 |
步骤1) 在Eclipse中创建Java项目
步骤2) 在Eclipse环境中添加Selenium和Selendroid JAR文件
右键单击Guru99Test Project->Build Path->Add External Archives
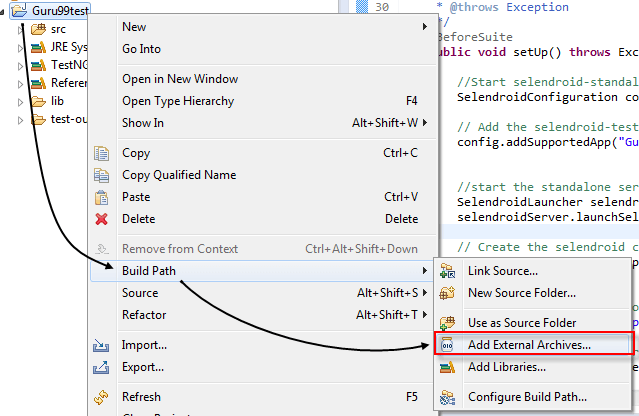
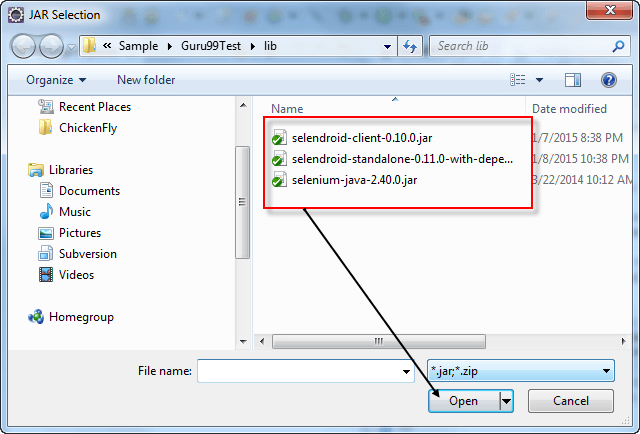
导航到存储JAR文件的文件夹,需要添加3个JAR文件
- selendroid-client-0.10.0.jar:selendroid java客户端库
- selendroid-standalone-0.11.0-with-dependencies:Selendroid独立服务器库
- Selenium-java-2.40.0.jar:Selenium Web驱动程序库
选择全部->选择打开以将JAR文件添加到项目中
步骤3) 添加上述库后,这些库将被添加到测试项目的参考库中。测试人员可以使用这些库的API来开发测试程序
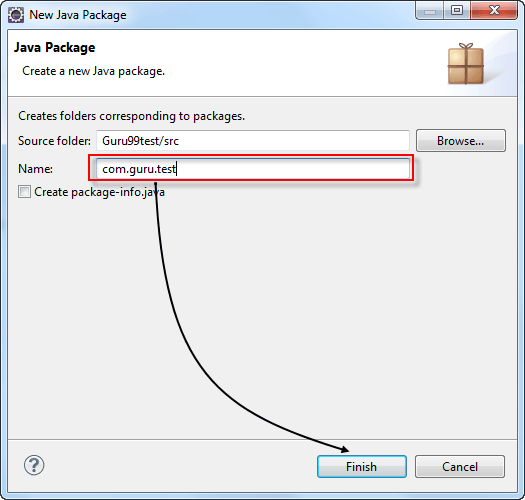
创建com.guru.test包,添加java文件Guru99Test.java,如下所示,右键单击Guru99Test->New->Package
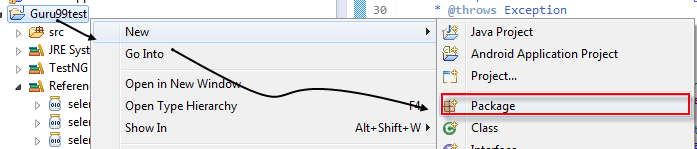
在New Java Package对话框àFinish上的Name字段中键入com.guru.test
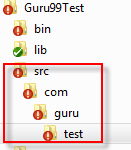
Eclipse将在源代码结构中创建如下列表文件夹和子文件夹
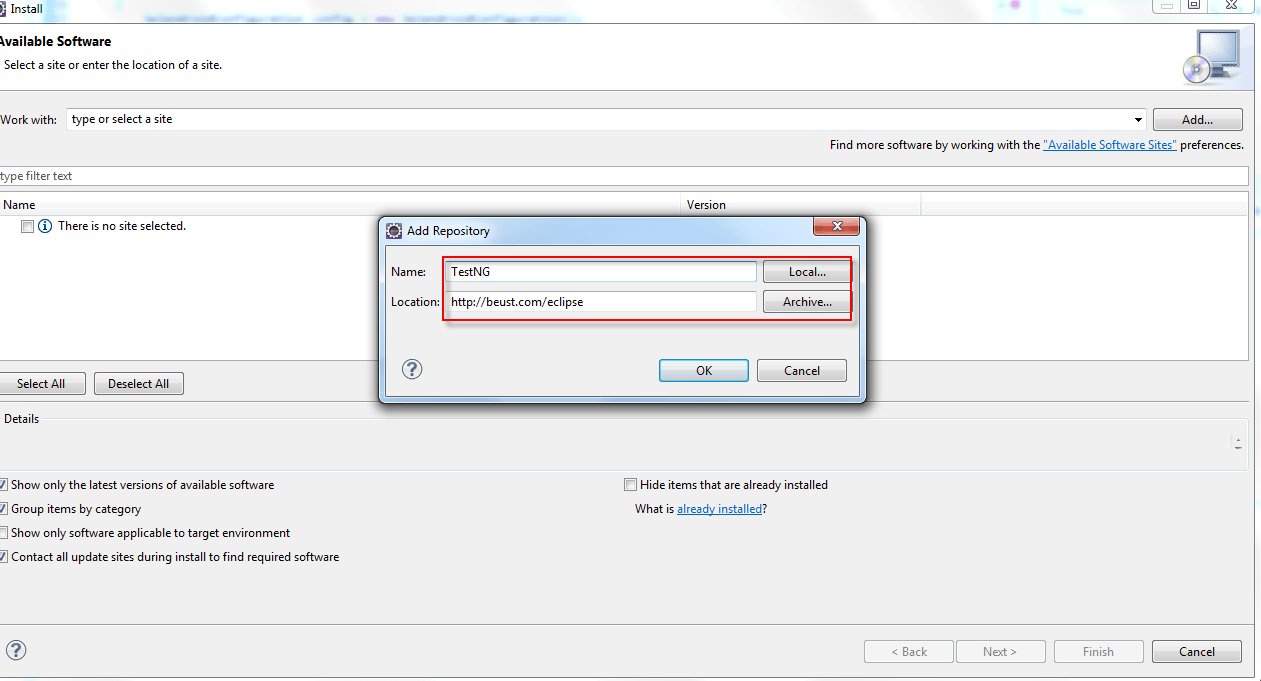
步骤4) 安装Eclipse的TestNG
在Eclipse的Help->Install New Software中,单击Install对话框中的Add并输入以下内容
- 名称:TestNG
- 位置:http://selendroid.io/
按OK->Next(确定->下一步)安装TestNG
步骤5) 将Guru99App.apk复制到测试应用文件夹
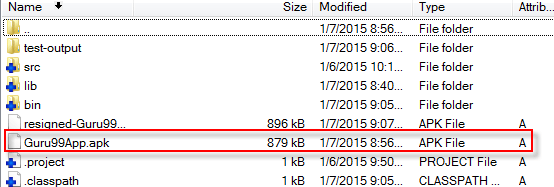
步骤6) 获取被测应用的ID。
假设我们有一个名为Guru99App.apk的APK文件。按照上一节描述的步骤,在终端上执行命令

在浏览器中打开以下链接
http://localhost:4444/wd/hub/status.
显示设备信息,复制appid值“com.guru99app:1.0”

步骤7) 打开文件Guru99Test.java(在示例代码中),并进行如下更改
要使用Selendroid创建新的测试会话,必须以以下格式提供应用程序ID:com.guru99app:1.0。如果没有设置与Android设备匹配的应用程序ID,测试会话将抛出错误,并且不会启动。 初始化找到的设备后,selendroid会创建一个自定义的selendroid-server,并在其上安装selendroid服务器
selendroid还会安装测试中的应用程序,并在设备上启动selendroid-server
成功初始化测试会话后,开始在设备上执行测试命令。如果测试追加了测试会话,则仿真器将自动停止
步骤8) 启动新的测试会话
如步骤6所示,在终端上使用以下命令启动Selendroid服务器

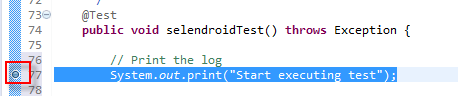
Selendroid Server启动后,在Eclipse上打开样例测试项目Guru99test,双击文件Guru99Test.java的第77行,在第77行设置一个断点->将显示一个点,如下所示
右键单击Guru99Test project->Debug As->TestNG Test启动测试会话。
测试会话将启动,如下所示
步骤9) 获取被测应用的GUI元素ID
测试会话成功启动后,打开浏览器,导航到url http://localhost:4444/inspector
将看到测试中的应用程序已启动,如下所示

将鼠标悬停在AUT的每个UI元素(Button、TextField、Text Label)上,每个元素的ID将在右窗格中突出显示
完成此步骤后,可以获取上述每个UI元素的ID
- 按钮显示文本ID:“btnShow”
- 文本字段ID:“edtText”
- 标签文本ID:“txtView”
这些ID将在下一步中使用
步骤10) 进入如下测试程序
使用Selendroid的测试程序包括3个部分
设置测试:
以下是设置测试的代码,它将设置测试会话的条件。如果出现错误,Selendroid将抛出异常,测试应用程序将停止。
代码包括解释每个语句的注释。
package com.guru.test;
import io.selendroid.SelendroidCapabilities;
import io.selendroid.SelendroidConfiguration;
import io.selendroid.SelendroidDriver;
import io.selendroid.SelendroidLauncher;
import io.selendroid.device.DeviceTargetPlatform;
import org.openqa.selenium.By;
import org.openqa.selenium.WebDriver;
import org.openqa.selenium.WebElement;
import org.testng.Assert;
import org.testng.annotations.AfterSuite;
import org.testng.annotations.BeforeSuite;
import org.testng.annotations.Test;
/
* @author Guru99 Test App using Selendroid
* Application under test: Guru99App
*
*/
public
class Guru99Test {
//Declare web driver variable
private WebDriver driver;
/
* Setup the environment before testing
* @throws Exception
*/
@BeforeSuite
public
void setUp() throws Exception {
//Start selendroid-standalone during test
SelendroidConfiguration config = new SelendroidConfiguration();
// Add the selendroid-test-app to the standalone server
config.addSupportedApp("Guru99App.apk");
//start the standalone server
SelendroidLauncher selendroidServer = new SelendroidLauncher(config);
selendroidServer.launchSelendroid();
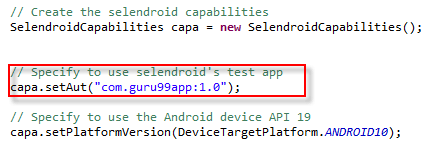
// Create the selendroid capabilities
SelendroidCapabilities capa = new SelendroidCapabilities();
// Specify to use selendroid's test app
capa.setAut("com.guru99app:1.0");
// Specify to use the Android device API 19
capa.setPlatformVersion(DeviceTargetPlatform.ANDROID19);
// Don't request simulator, use real device
capa.setEmulator(false);
//capa.wait(10000000);
// Create instance of Selendroid Driver
driver = new SelendroidDriver(capa);
}
执行测试
下面是执行测试的代码。代码包括注释
以下是再次执行的测试步骤
-
输入文本“Hello Guru”
-
单击显示文本按钮
-
稍等片刻
-
验证应用程序是否在用户输入文本字段时显示文本(例如显示文字“Hello Guru”)
/
* Start execute the test case
* 01. Enter the text "Selendroid" to the textfield
* 02. Press OK button
* @throws Exception
*/
@Test
public
void selendroidTest() throws Exception {

// Print the log
    System.out.print("Start executing test");

// Find the input text field on screen
// The id of this text field was get from step 9
    WebElement inputField = driver.findElement(By.id("edtText"));

// Verify that the text field enabled so user can enter text
    Assert.assertEquals("true", inputField.getAttribute("enabled"));

// Enter a text to text field
    inputField.sendKeys("Hello Guru");

// click Show Text button
// The id of this button was get from step 9
    WebElement button = driver.findElement(By.id("btnShow"));
    button.click();

// Delay time to take effect
    Thread.sleep(5000);

//Find the label "Text Show Here" on screen
// The id of this label was get from step 9
    WebElement txtView = driver.findElement(By.id("txtView"));

//Get the text display on screen
    String expected = txtView.getText();

// Verify that the text which user enter on text field is same as text display on screen
    Assert.assertEquals(expected, inputField.getText());

}
完成测试
以下代码将通过停止Selendroid驱动程序来完成测试。
/
* Stop the Selendroid driver
*
*/
@AfterSuite
public
void tearDown() {
    driver.quit();
}
可以在本文包含的示例代码中看到详细信息。
步骤10) 通过USB线将Android设备连接到PC。要观察的要点-
-
确保设备未配置屏幕锁定。
-
必须通过USB将设备插入运行selendroid独立组件的计算机。
-
设备应至少安装Android目标版本API 10
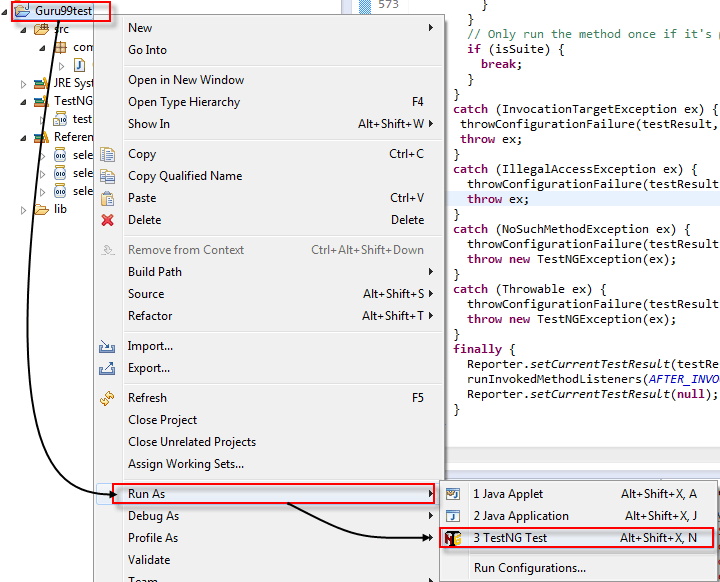
步骤11) 运行测试App:右键点击Guru99test->Run As->TestNG test
步骤10) 脚本开始执行,如下所示
步骤12)测试执行完成后,TestNG自动生成测试报告如下
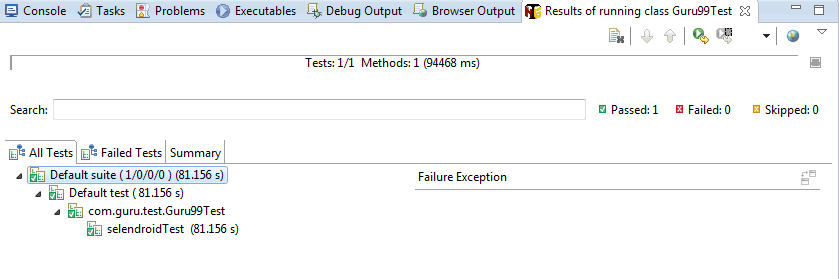
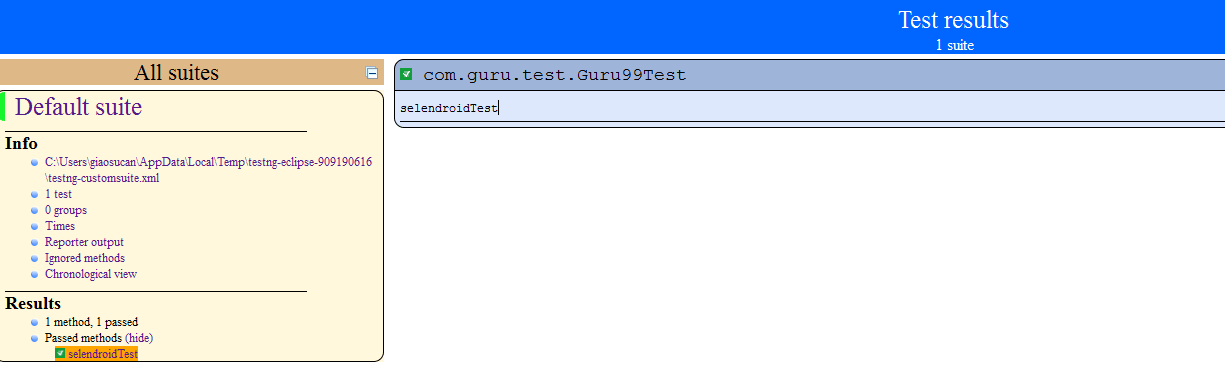
现在已经完成测试了。
总结
-
Selendroid是一款非常强大的工具,用于测试Android原生应用程序、混合应用程序以及Web应用程序。
-
它既可以在真实设备上使用,也可以在模拟器上使用。
-
它还允许通过在多个设备上运行测试来并行运行测试。
-
整个Selendroid套件由四个组件组成:
-
Web驱动程序客户端,
-
Selendroid-服务器,
-
Android驱动程序应用
-
Selendroid-独立站立
-
-
要使用Selendroid,需要安装Java JDK、Android SDK和Eclipse。