Jenkins是Hudson实验室开发的领先的开源持续集成工具。当作业中发生特定步骤时,它会触发预配置的操作。
在本教程中,我们将学习
- Jenkins的重要特征
- 为什么是Jenkins和Selenium?
- Maven是什么?
- 安装Maven并将其与TestNG Selenium一起使用的步骤
- 安装Jenkins并将其配置为使用TestNG Selenium运行Maven的步骤
- 安排Jenkins自动执行。
- Jenkins与TestNG
- Jenkins的好处
Jenkins的重要特征
- 更改支持:Jenkins生成在SVN等存储库中完成的所有更改的列表。
- 永久链接:Jenkins提供指向最新版本或失败版本的直接链接,可用于轻松通信
- 安装:无论是使用直接安装文件(Exe)还是使用应用服务器部署的WAR文件,Jenkins都很容易安装。
- 电子邮件集成:Jenkins可以配置为通过电子邮件发送构建状态的内容。
- 轻松配置:在Jenkins上配置各种任务很容易。
- TestNG测试:Jenkins可以配置为在其上运行自动化测试构建TestNG在每次构建SVN之后。
- 多个虚拟机:Jenkins可以配置为在多台机器上分发构建。
- 项目构建:Jenkins记录了JAR的细节、JAR的版本以及构建号和JAR号的映射。
- 插件可以在Jenkins中配置Party插件以使用特性和附加功能。
为什么是Jenkins和Selenium?
- 在Jenkins中运行Selenium测试允许在每次软件更改时运行测试,并在测试通过时将软件部署到新环境。
- Jenkins可以安排测试在特定时间运行。
- 可以保存执行历史记录和测试报告。
- Jenkins支持Maven构建和测试持续集成中的项目。
Maven是什么?
Maven是一个功能强大的项目/构建管理工具,它基于POM(Project Object Model,项目对象模型)的概念,它包括Maven的项目信息和配置信息,如构建目录、源目录、依赖项、测试源目录、目标、插件等。
为什么是Maven&Jenkins
Selenium WebDriver非常适合浏览器自动化。但是,当它用于TE时将Maven与Selenium集成提供了以下好处 Apache Maven为管理测试项目的整个生命周期提供支持。
- Maven用于定义项目结构、依赖项、构建和测试管理。
- Maven在构建项目时会自动从存储库中下载必要的文件。
安装Maven并将其与TestNG Selenium一起使用的步骤
在本教程中,我们将使用Eclipse(Juno)IDEJava语言开发人员设置Selenium WebDriver项目。此外,我们需要将m2eclipse插件添加到Eclipse以简化构建过程并创建pom.xml文件。
让我们通过以下步骤将m2eclipse插件添加到Eclipse中:
步骤1) 在Eclipse IDE中,选择 帮助 | 安装新软件 从Eclipse主菜单。
步骤2) 在安装对话框中,输入URLhttp://download.eclipse.org/technology/m2e/releases/。选择 使用 和M2E插件,如下图所示:
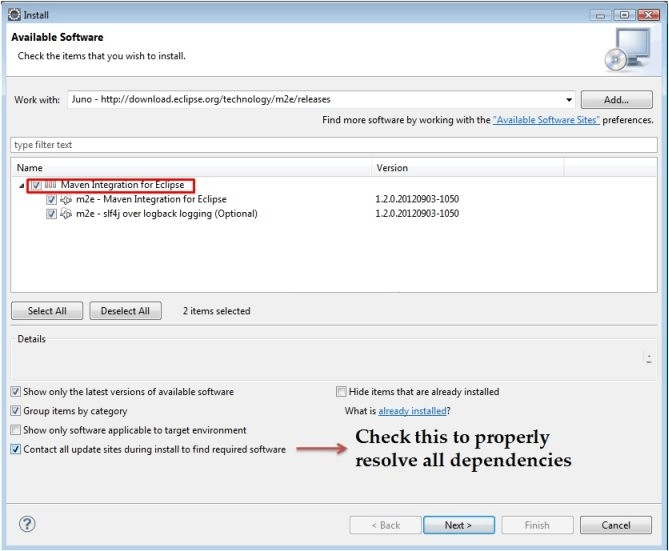
步骤3) 单击 下一步 按钮并完成安装。
使用Maven配置Eclipse
安装了M2E插件后,我们现在需要创建Maven项目。
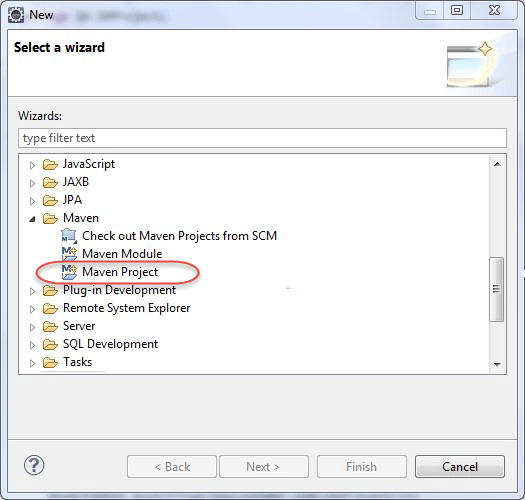
步骤1) 在Eclipse IDE中,通过选择 文件 | 新的 | 其他 从Eclipse菜单。
步骤2) 在 新的 对话框中,选择 马文 | Maven项目 并单击下一步
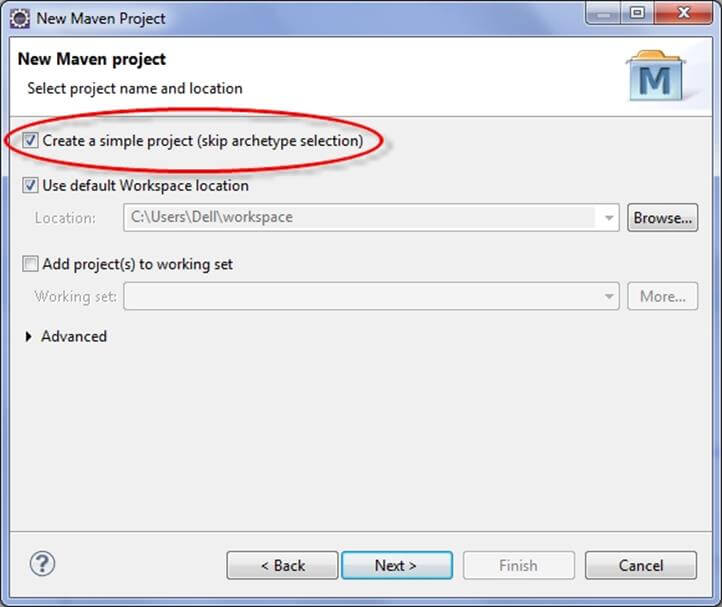
步骤3) 在 New Maven项目 对话框中选择 创建一个简单的项目 并单击下一步
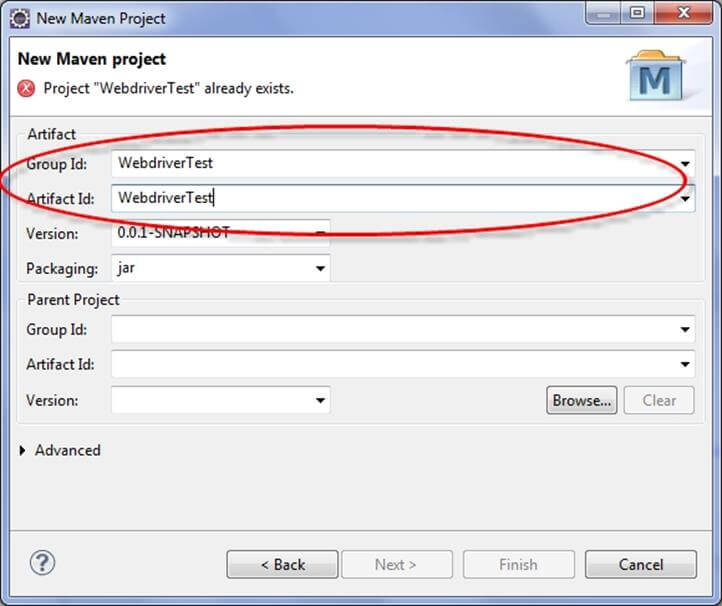
步骤4) 在以下位置输入WebdriverTest 组ID :和 项目ID :,然后单击完成
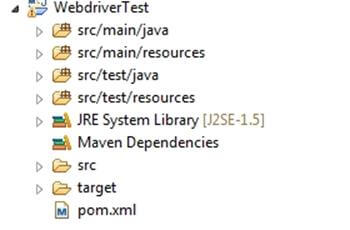
步骤5) Eclipse将创建 WebdriverTest 结构如下:
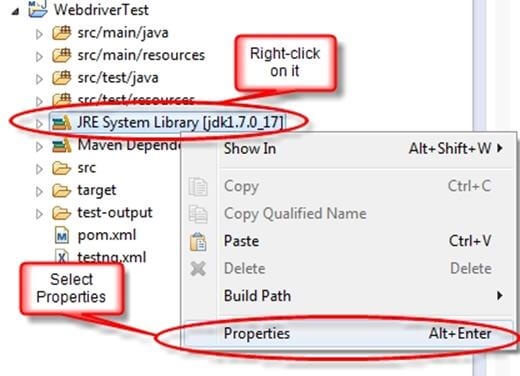
步骤6) 右键单击 JRE系统库 并选择 属性 菜单中的选项。
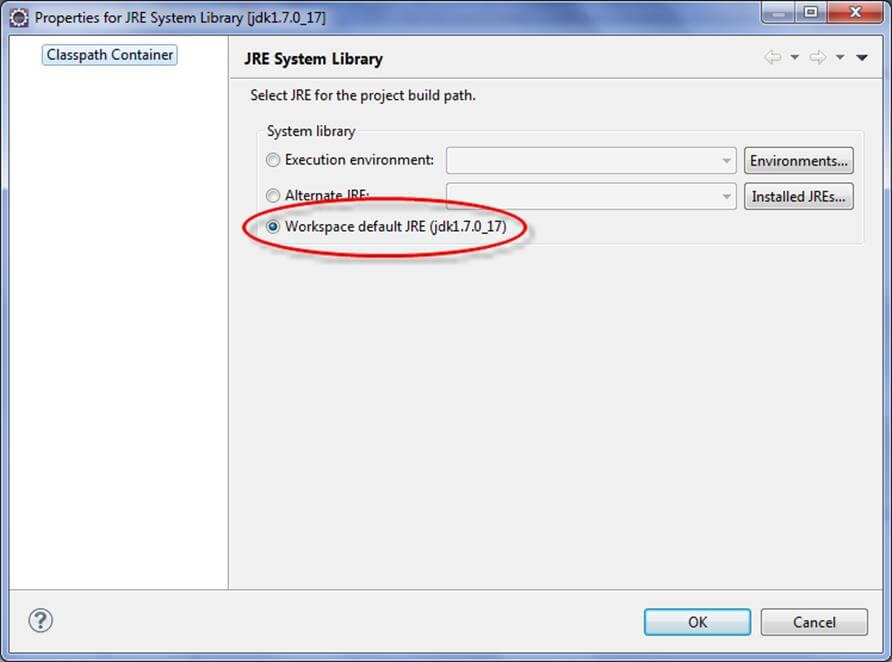
在JRE系统库的属性对话框中,确保 工作区默认JRE 处于选中状态,然后单击确定
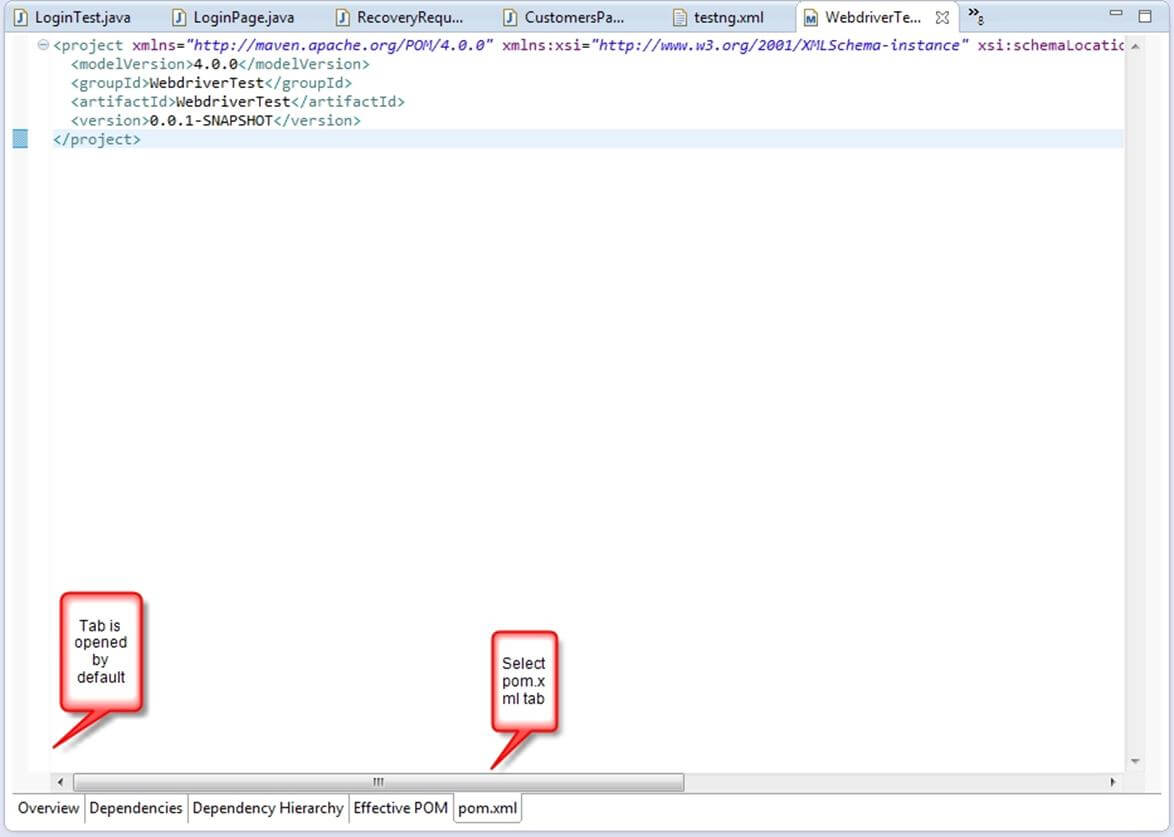
步骤7) 。选择 pom.xml 从… 项目资源管理器 。。
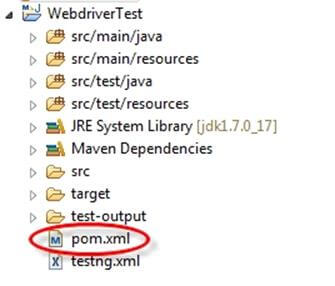
将在编辑器部分中打开pom.xml文件
步骤8) 加入Selenium,Maven,TestNG,Junit
步骤9) 创建一个新的TestNG类。输入包名为“Example”和“NewTest”。 名字 :TextBox并单击 完工 按钮,如以下截图所示:

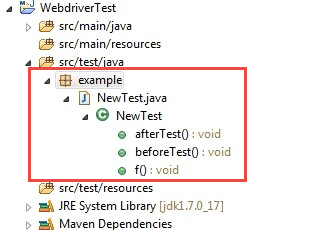
步骤10) Eclipse将创建NewTest类,如以下屏幕截图所示:
步骤11) 将以下代码添加到 新测试 类:
此代码将验证Guru99 Selenium Page的标题
package example;
import org.openqa.selenium.By;
import org.openqa.selenium.WebDriver;
import org.openqa.selenium.firefox.FirefoxDriver;
import org.testng.Assert;
import org.testng.annotations.Test;
import org.testng.annotations.BeforeTest;
import org.testng.annotations.AfterTest;
public class NewTest {
private WebDriver driver;
@Test
public void testEasy() {
driver.get("http://www.itxiaonv.com/test/guru99home/");
String title = driver.getTitle();
Assert.assertTrue(title.contains("Demo Guru99 Page"));
}
@BeforeTest
public void beforeTest() {
driver = new FirefoxDriver();
}
@AfterTest
public void afterTest() {
driver.quit();
}
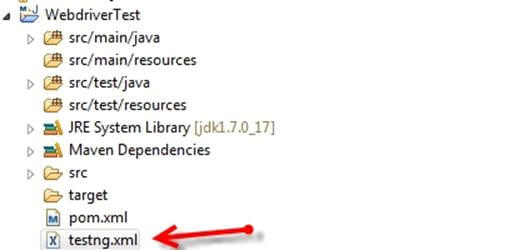
} 步骤12) 右键单击WebdriverTest并选择 TestNG | 转换为TestNG 。
Eclipse将创建testng.xml,表示只需要运行一个名为 新测试 如以下截图所示:

更新项目并确保该文件出现在树中 包资源管理器 (右键单击项目-刷新)。
步骤13) 现在需要对此运行测试testng.xml。
所以,转到 运行配置 并创建一个新的启动 TestNG ,选择项目和字段 套件 作为 testng.xml 然后单击Run(运行
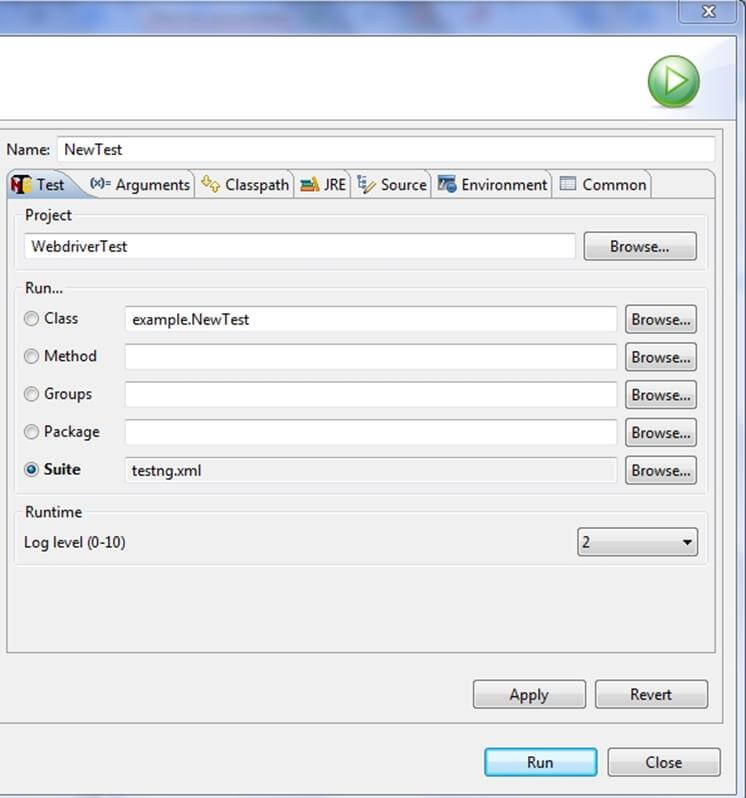
确保构建成功完成。
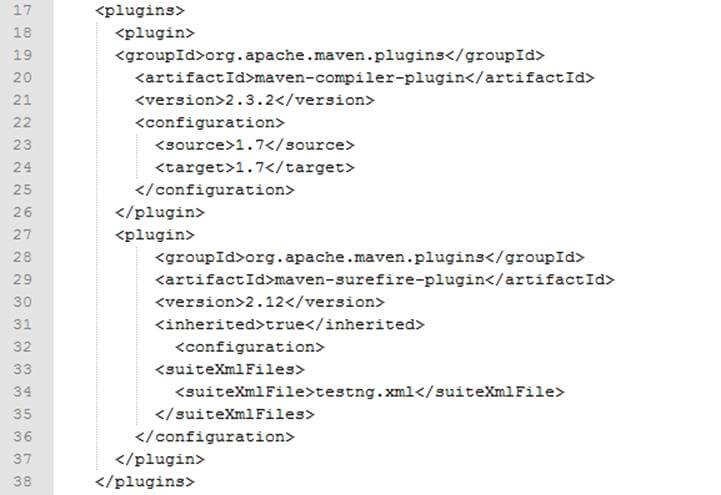
步骤14) 此外,我们还需要添加
- maven-编译器-插件
- maven-surefire-plugin
- testng.xml
到pom.xml。
maven-surefire-plugin用于配置和执行测试。这里使用plugin来配置testing.xml以进行TestNG测试,并生成测试报告。
MAVEN-COMPILER-Plugin用于帮助编译代码并使用特定的JDK版本进行编译。将以下代码片段中的所有依赖项添加到
步骤15) 要运行 E 测试在Maven生命周期中,右键单击WebdriverTest并选择 运行方式 | Maven测试 。Maven将执行该项目的测试。
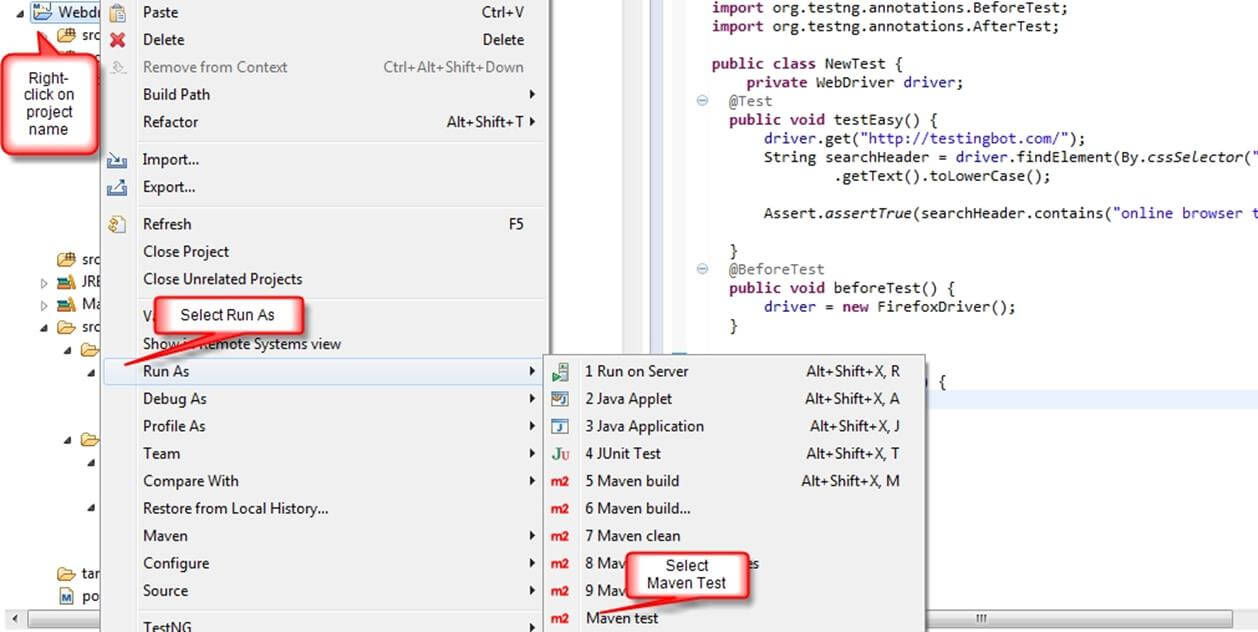
确保构建成功完成。
安装Jenkins并将其配置为使用TestNG Selenium运行Maven的步骤
安装
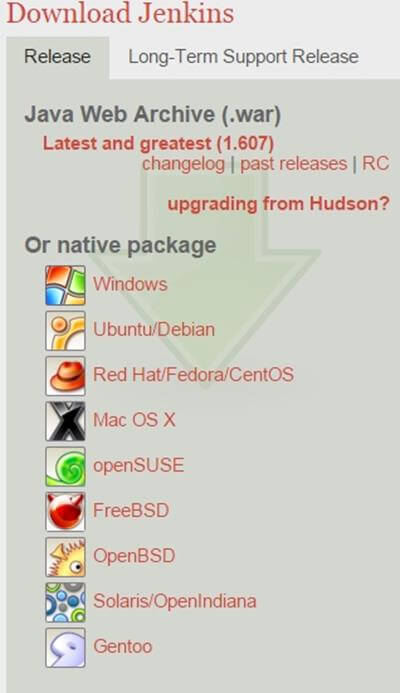
步骤1) 去http://jenkins-ci.org/并为操作系统下载正确的软件包。安装Jenkins。
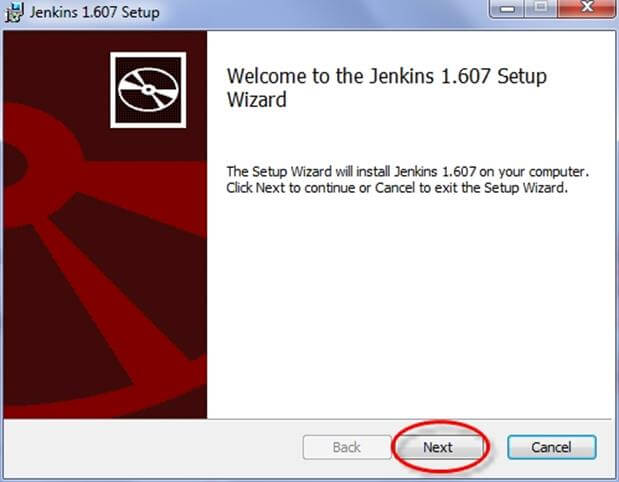
步骤2) 将Jenkins解压到指定的文件夹。运行exe文件,如以下截图所示:

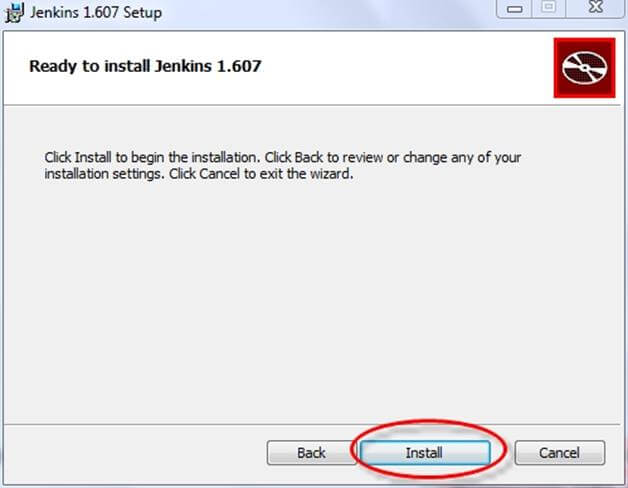
步骤3) 在……里面 Jenkins 1.607设置 窗口单击打开 下一步 按钮。
步骤4) 单击 安装 按钮在最后。
步骤5) 安装完成后,导航到浏览器窗口中的Jenkins Dashboard(默认情况下为http://localhost:8080)。
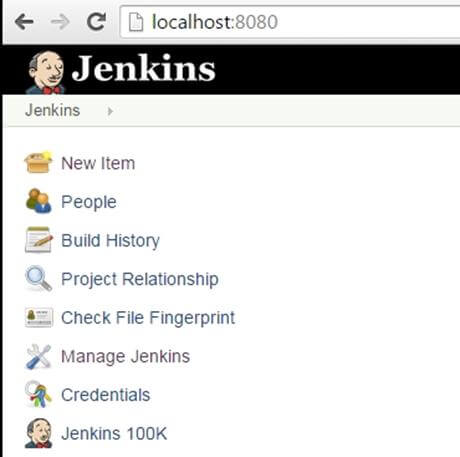
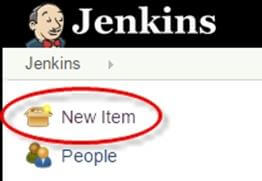
步骤6) 单击 新建项目 创建配置项作业的链接。
步骤7) 选择Maven项目单选按钮,如以下屏幕截图所示:
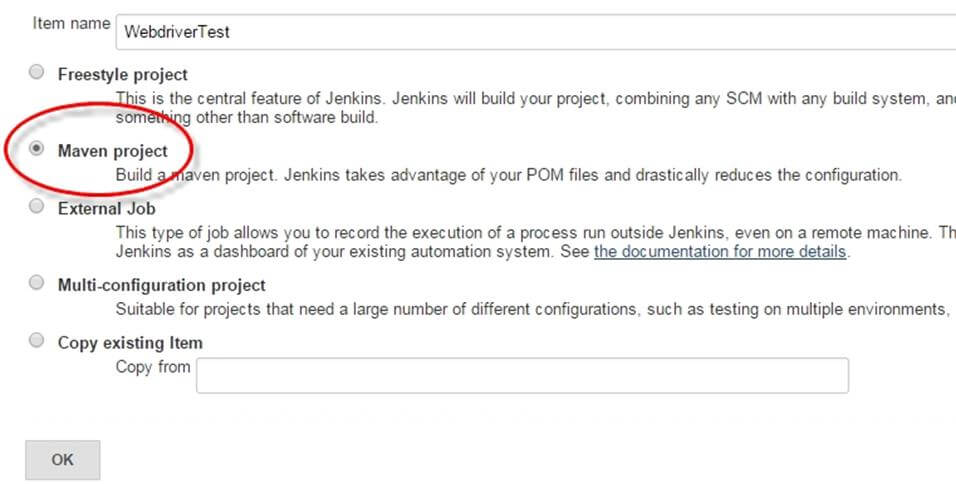
使用内部版本为 Maven项目 选项,Jenkins支持构建和测试Maven项目。
步骤6) 单击确定按钮。在Jenkins Dashboard中创建一个名为“WebdriverTest”的新作业。

步骤7) 去 管理Jenkins => 配置系统 如下面的屏幕截图所示。
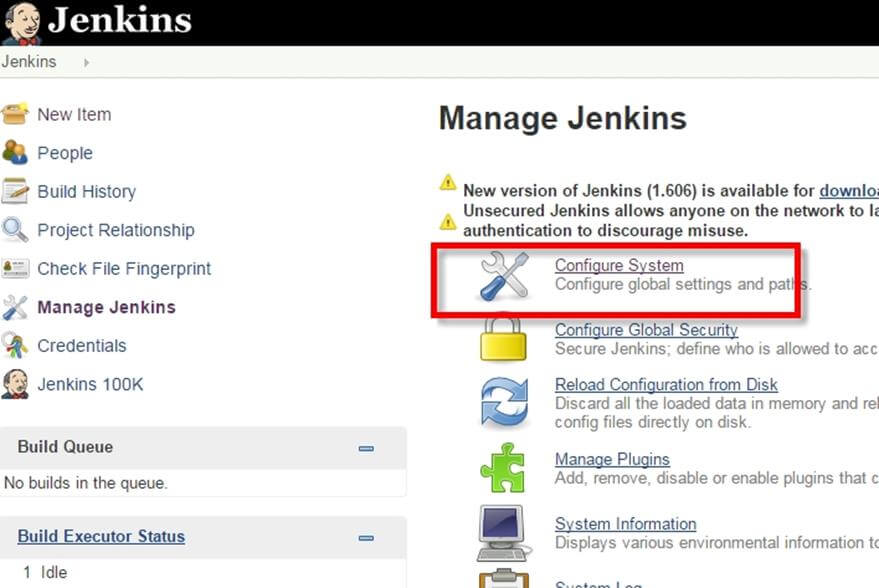
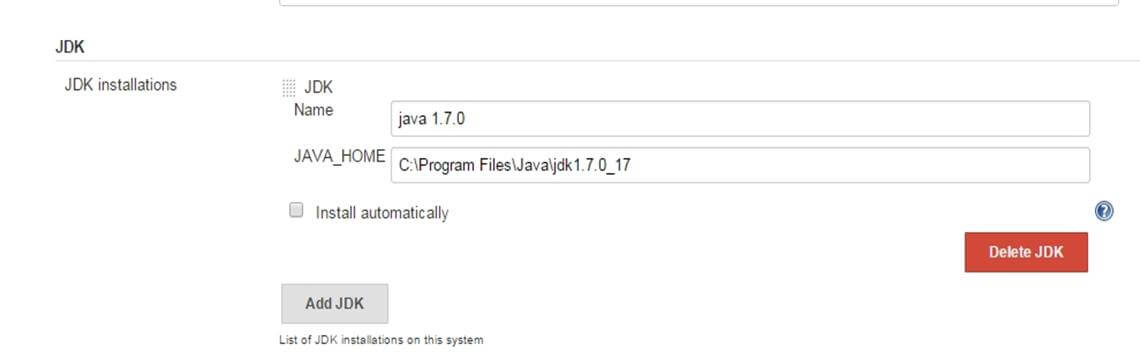
单击JDK Installations并配置JDK,如以下屏幕截图所示:
步骤8) 转到 构建 新工作的一部分。
- 在 根POM 文本框中,输入pom.xml的完整路径
- 在目标和选项部分,输入“CLEAN TEST”

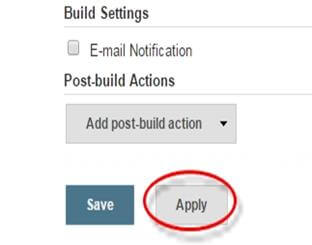
步骤9) 单击 应用 按钮。
步骤10) 在WebdriverTest项目页面上,单击 立即构建 链接。
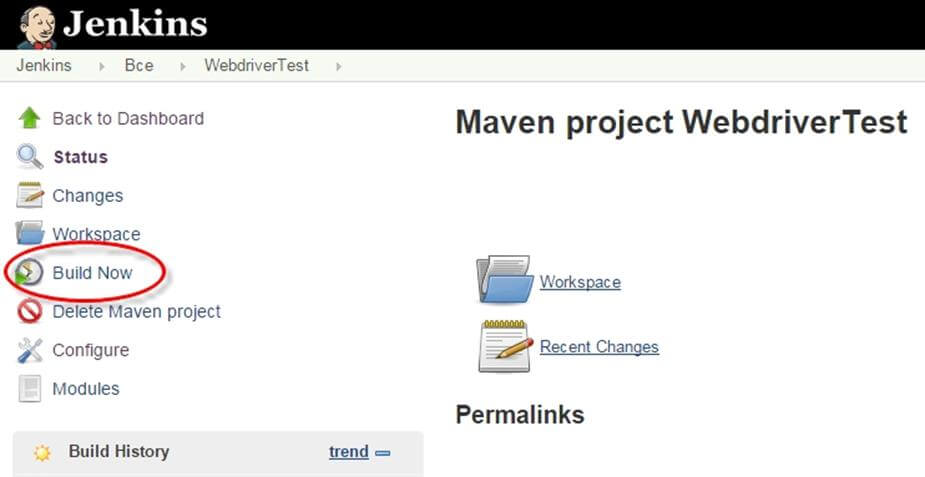
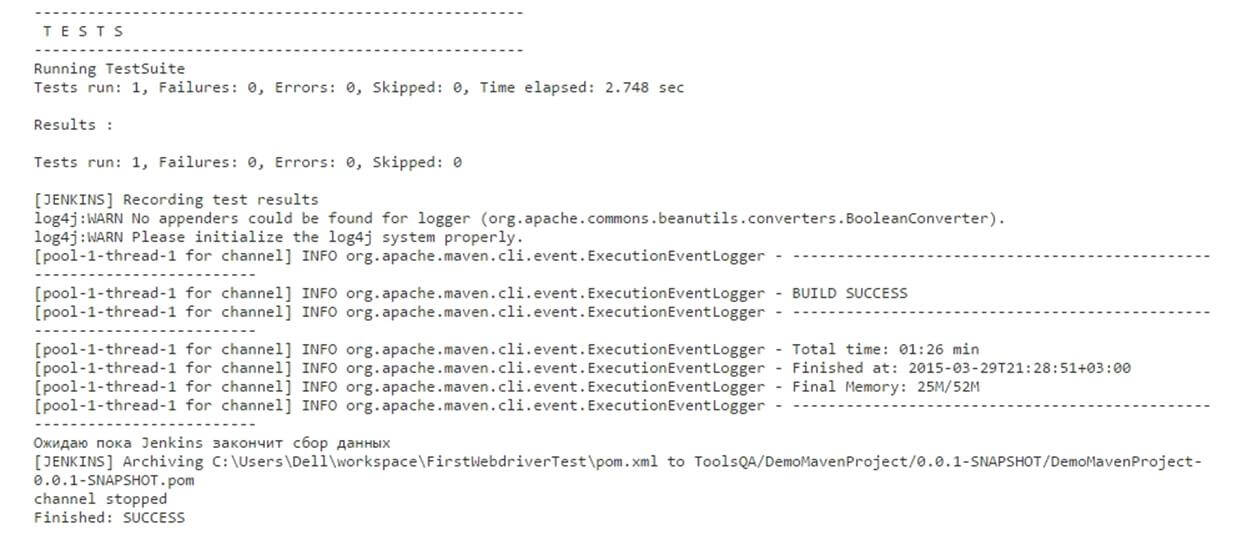
Maven将构建该项目。然后,它将让TestNG执行测试用例。
步骤11) 构建过程完成后,在Jenkins Dashboard中单击 WebdriverTest 项目
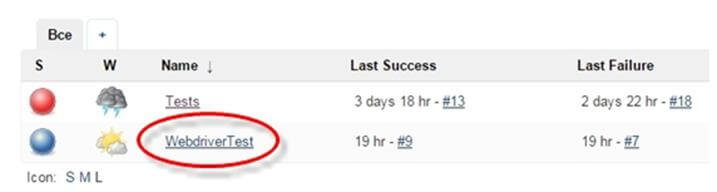
步骤12) WebdriverTest项目页面显示构建历史记录和指向结果的链接,如以下屏幕截图所示:
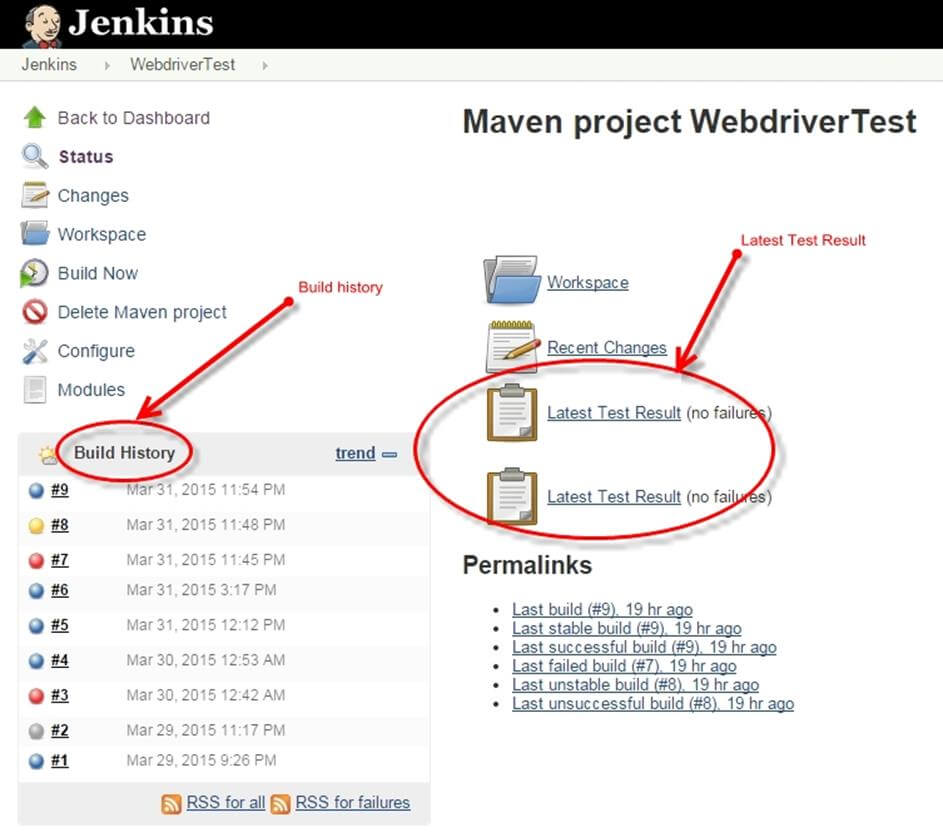
步骤13) 单击“最新测试结果”链接查看测试结果,如以下屏幕截图所示:

步骤14) 。选择特定构建,将通过单击“”查看当前状态。 控制台输出 “。”
安排Jenkins自动执行。
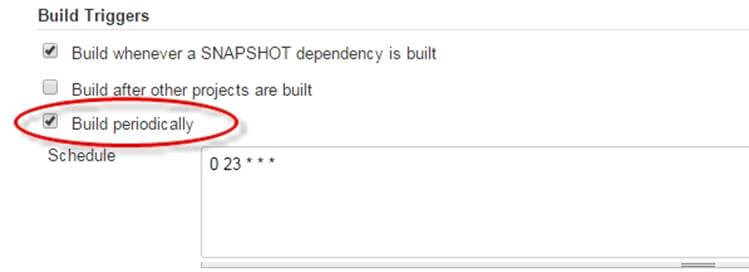
Jenkins提供了多种方式来触发构建触发器配置下的构建过程。
例如:在计划文本框中输入0 23*,如以下屏幕截图所示。这将在每天晚上11点触发构建过程。
在没有Maven的情况下使用Jenking
要在Jenkins中运行纯TestNG脚本,在Build中输入以下内容
d: >java-cp“Pathtolibolder\*;Pathtobinolder”org.testng.TestNG testng.xml
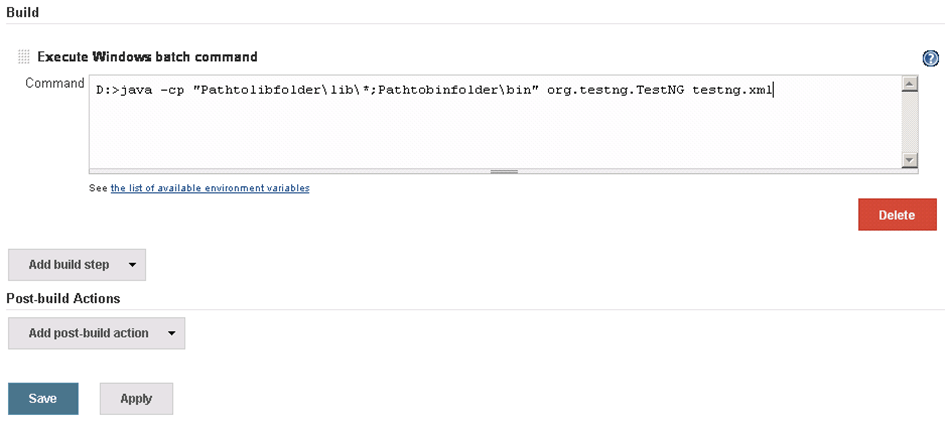
- 单击保存按钮。
- 注意:lib和bin文件夹的实际路径需要在上面的命令中添加。
- 保存命令后,Jenkins将在预定义的时间内构建项目,并且该命令将使用TestNG运行。
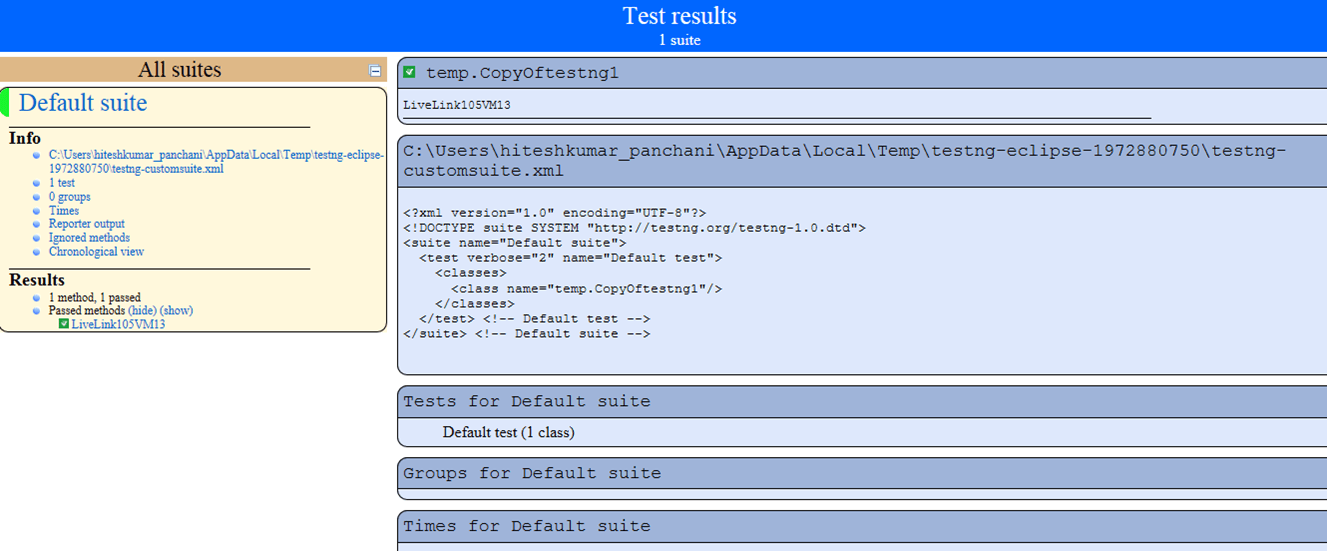
- 结果将存储在自定义报告HTML文件中,该文件可以使用Jenkin配置通过电子邮件发送
- 代码的输出将是
使用Jenkins的好处
- 早期问题发现-可以在软件开发的早期阶段检测到Bug
- 自动集成-集成所有更改不需要单独的工作
- 安装程序-在任何开发阶段都可以使用的可部署系统
- 记录-维护的部件制造记录
- 支持和插件:Jenkin受欢迎的原因之一是可以获得大型社区支持。此外,还有许多现成的插件可以帮助扩展其功能。